Let’s face it, while Marketo is an amazingly robust platform, its email editor leaves a little to be desired. If you’re tired of spending hours trying to build an email newsletter for Marketo with their editor only to settle for “good enough”, you should check out the BEE free editor.
With this free online email creator, you can quickly and easily create a stunning newsletter that can then be sent through your Marketo instance. The sleek, user-friendly BEE free editor is very easy to use. However, there is a process to get it into your Marketo instance. But don’t worry, we’ve put together an in-depth overview of how to use BEE free templates to create a newsletter for Marketo.
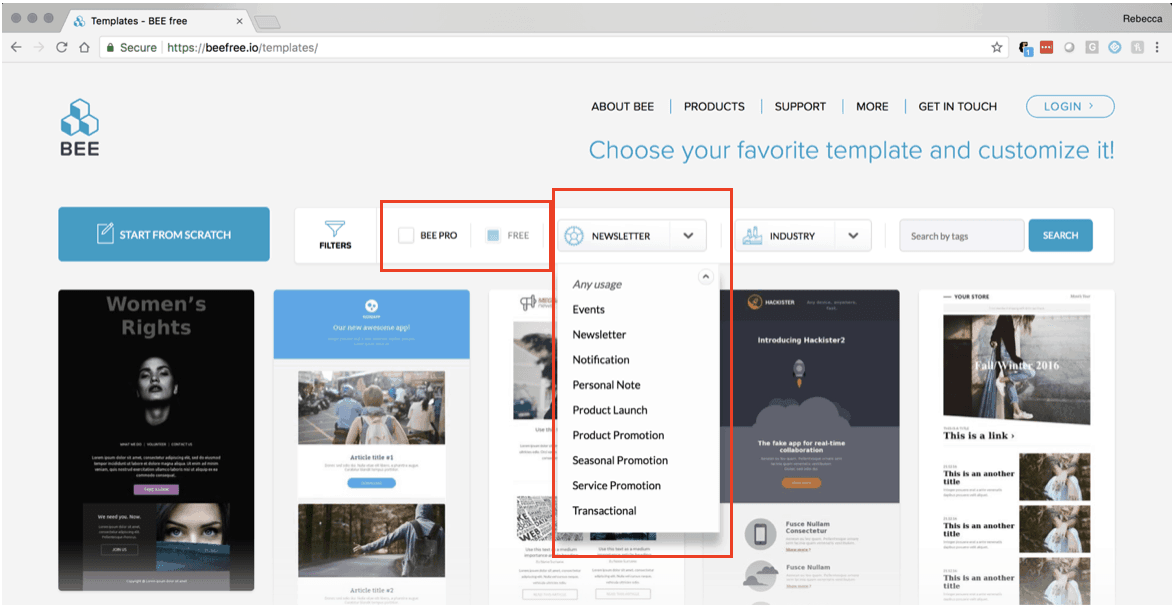
On the BEE free site, you’ll start by choosing a template design or creating your own custom layout. For our purposes here, we’re going to create a newsletter for Marketo. You can use the site’s simple sorting features to help you quickly find a stellar template. Be sure you deselect the “BEE Pro” box in the filter bar so you only see the free templates.

Once you select a template design and click “get started”, the editor automatically opens. The BEE free email editor is very intuitive with simple drag and drop functionality. You can drag to reorder elements or you can delete a section if not needed. This editor gives you the ability to customize everything from background colors to fonts, allowing your finished product to truly match your company’s branding standards.
Any images you’d like to use in the email can be imported and quickly added to your email through BEE free or you can choose from their selection of stock photos. Click on the section of the email you’d like to place an image. In the right-hand toolbar click “change image”. From there you can choose a stock photo or upload your own. Hit “insert” next to the image you want and that’s it!
At any time while you’re creating your newsletter for Marketo, you can use the “actions” drop-down menu in the top left corner to either preview your template or send a test so you can view it inside an email client. Plus, all of the BEE free email templates are already mobile responsive.
Once you have your email exactly how you want it, hit “save” in the top right corner. You will then be given the option to truly save your template by upgrading to the Pro version or downloading it for free. For our purposes, we just want to download it so we can put it in Marketo. So for that, just hit the “download” option and you’ll be ready to move on to the Marketo side of things.
Once you’ve downloaded your email from BEE, you’ll need to open the “beefree” folder that has been placed in your computer’s “Downloads” folder. Inside, you’ll see an .html file. Open that file. It will open a webpage view of the email you just created.
Once viewing that .html file, right-click anywhere (except on an image) on that page and select “view page source.” This brings you to a new page filled with code. For those of us who aren’t web designers or programmers, this page won’t make a lot of sense. But don’t worry, you don’t have to understand the code! You just need to know how to copy and paste.
Start by highlighting the ENTIRE page. It’s important that you have ALL the text on this page highlighted as any missed sections will cause your email to not render correctly once inside Marketo.
After you’ve copied the code, you’ll need to open your Marketo instance. Once logged in, navigate to the Design Studio or Marketing Activities — where ever you’d like your new email to live. Open to create a new email and choose “personal note” as your template. This is simply a blank email. Using it here just makes it easier and faster to edit the HTML.
When the Marketo email editor opens, click “email actions” in top left and select “edit code.” Or you can click the “edit code” button directly on the top navigation bar. Here, you’ll need to delete everything on this page. Once the page is blank, right-click to paste the code you copied earlier from your new BEE free email. Now, your newsletter for Marketo is almost ready.
Updating the image links can be the most tedious part of the entire process but it’s really not that bad once you understand the process and may not be necessary for all situations. It just depends on how many images you uploaded to BEE when creating your email initially.
If you uploaded your company logo or any other images to BEE, you’ll now need to upload those same files to Marketo and replace the image links in the code to reference those Marketo hosting links. The reason is, Marketo needs to have access to where those images are hosted in order to properly load them when your email is opened by the end-user. Of course, you can opt to upgrade to BEE Pro which includes image hosting which would allow you to completely skip this step. But for those who like to save money with the BEE free option, here’s what you’ll need to do.
In Marketo, open the Design Studio and upload your images to the Images and Files section. Once you’ve uploaded them, open one in the Marketo files. It will give you a link to copy. Copy that link and go back to your HTML code in the Marketo email editor.
To quickly find the correct image link, simply use the search feature in the top right corner when looking at the “edit code” page and search for the name of your image file. For example, if you’ve uploaded a header image and the image file is title “header_image”, search for that and you’ll be taken directly to the link.
Once you’ve located it, simply replace the URL with your new Marketo URL. Be sure to leave the rest of the code intact. You just want to change the URL, nothing else. Repeat this for all images and save.
The last step in this process is to ensure your unsubscribe verbiage and links are added to the BEE email newsletter for Marketo. This process can vary depending on how you handle your unsubscribe links in Marketo but the most common process is to use the email settings in the Admin panel of Marketo.
Open the Admin section in your instance and click “Email”. If you have this setup to display your unsubscribe info as you want it, then Marketo will automatically add it to every email sent through your instance.
Now you have a high-class email newsletter for Marketo that’s ready to send to your database.
While you’re here, be sure to check out our other BEE Free email builder tips for Marketo.
