
Mailchimp is a popular email marketing tool that offers an array of features for businesses who are looking for a way to manage their contacts and email marketing all in one tool.
Like many ESPs (Email Service Providers), Mailchimp includes an RSS-to-email feature that allows you to automate a blog notification email on a daily, weekly, or monthly basis.
However, the Mailchimp RSS email feature can be frustrating, from both a design and functionality perspective. So today, we’re going to take a look at an integration that can solve these problems and make it much easier to create and automate attractive RSS emails from Mailchimp.
How Mailchimp RSS Emails Work
Mailchimp RSS emails are designed as a simple, straightforward solution to automate your blog emails, provided that the blog has an RSS feed.
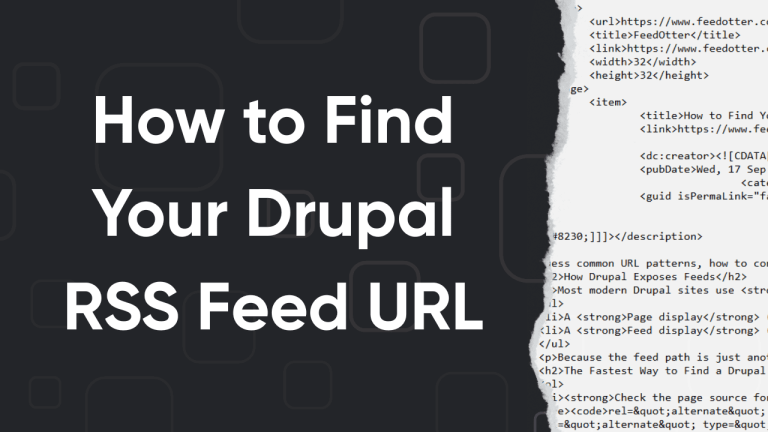
When you set up this type of email, you’ll be prompted to add your RSS feed URL and designate how often you want the email to send. (Mailchimp will only send the email if there is new content.)
Once this is set up, you can choose from one of Mailchimp’s templates and start designing your RSS newsletter.
Shortcomings of Mailchimp RSS Emails
RSS emails are a fairly simple type of newsletter to send out, but there are a few challenges you might encounter when sending this kind of email with Mailchimp.
Basic Design Options
To create an RSS email, you’ll use the regular Mailchimp email builder, but add an RSS block to the email that will pull your blog post content. To add an image, you’ll drag and drop the RSS image block into your email builder.
However, the only real design edits for each blog include changing the font size and color, or adding content before or after the RSS feed block. Keep in mind that this is an automated email, so any custom content will appear in every email.
Limited to 1 RSS Feed
Mailchimp automated RSS emails only work for a single feed, which can be frustrating when you work with multiple blogs and want to create an automated roundup of your most recent posts across the board.
Advanced Customization Options for Mailchimp RSS Emails
If your business relies on Mailchimp for email marketing, you might be tempted to sacrifice a few hours out of your work week to manually building out and sending out your RSS emails.
Fortunately, there is a Mailchimp integration with a tool called Feedotter that allows you to maximize the ROI on your emails in a fully automated way.
Feedotter: the RSS Email Tool for Mailchimp Users
Feedotter is an RSS email tool that offers a native integration with Mailchimp, which means that every email it sends out appears directly in your Mailchimp account. (So you don’t have to choose between good-looking RSS emails and the data you need to continue growing and scaling your email marketing strategy.)
How to Create an Automated Mailchimp RSS Email Using Feedotter
Feedotter is a web-based tool, so you can log in and use your account anywhere.
To get started, you’ll want to log into your Feedotter account (or create a free trial account), and head to the Automated section, where you can create a new Automated email.

1. Enter your RSS feed URL parameters
You can add your RSS feed into the designated input box. Feedotter will then validate your feed and display an email preview using your feed content in the right pane of the application.
Feedotter supports any valid RSS/Atom/XML feed. In addition, Feedotter supports the advanced ability of adding multiple RSS feeds which can be combined into 1 content stream or used to create complex multi-section newsletters.
If you’re not sure if your RSS feed will work with Feedotter we recommend using https://validator.w3.org/feed/ to ensure your feed is valid. Any valid feed will work with Feedotter.
Here, we also told Feedotter to display 5 posts with each email send. This means Feedotter will send up to 5 new posts in your email.
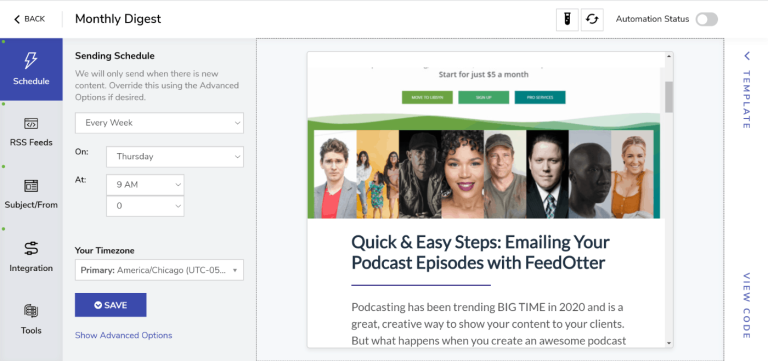
2. Define your automated RSS email schedule
In the Schedule tab, you can define your sending parameters. In the screenshot below, you can see we’ve set up our Mailchimp RSS email to automatically send every week, on Thursday at 12am CT.
By default, Feedotter will only send an email when there is new content (you can turn this option off, if your specific use case requires it).

3. Customize your template to match branding
Feedotter includes a growing library of verified, Litmus-tested, email templates that you can use to build a great looking automated email very quickly.
To browse the available templates, head into the Customize tab and check out the Template Library.

The templates include various layouts and will auto-insert images, blog titles, read more links, etc.
If you are using one of the built-in email templates you can choose from any number of customization options. The most important ones are:
- Adjusting colors to match your brand
- Uploading a logo or header file
- Configuring the email, name, reply-to
- Think of an engaging subject line and include personalized date or content tokens
For each template you can view, edit, and tweak the code—and plain text—of whichever template you’re using.
4. Set up your UTM parameters
The RSS email we are creating will be sent by Mailchimp and will rely on Mailchimp’s built-in campaign reporting to measure email engagement statistics such as opens and clicks but we also want to measure the increase in website traffic delivered by our content emails. To do this we can use UTM parameters.
Feedotter has a built-in feature that will automatically add the correct UTM parameters to your content links so every click on your content will be tracked in your Google Analytics account.
5. Connect your Mailchimp account
When you are done with the campaign setup, it’s time to publish your new automated RSS email to Mailchimp where we will complete the last step of setting up our email audience.
Click the Integration tab button in the left column of your campaign window. Click Connect to Mailchimp.
If you have previously set up a Mailchimp connection in your Feedotter account, you can select it from the dropdown. Otherwise, click the Add a Mailchimp Connection button.
The first time you connect Feedotter and MailChimp you will be prompted to setup a connection, a straightforward process thanks to the Mailchimp auth process.

When you’ve logged into your Mailchimp account, a new form will appear that allows you to select an email campaign folder, which is where Feedotter will put the automated emails it creates. This is only important from an organizational standpoint but it is required that you have at least 1 folder (we want you to stay organized).
Then select the list (or Audience, which is what Mailchimp now calls them), and the segment to determine who will receive your RSS emails.
At this point you will be returned to Feedotter and your connection should be set up and ready to go.
7. Save and Activate
Upon clicking the Save and Publish button, Feedotter will start your automated email campaign. You will be returned to the Feedotter dashboard where your campaign is visible.
Pay special note to the “Next Send” information as this will tell you when your next scheduled send will occur. If you need to change anything, click the Edit button.
Key Takeaways
- Mailchimp is a great email automation tool, but its RSS email feature is pretty limited when it comes to design and customized sending options.
- Feedotter offers a native integration with Mailchimp, which allows you to build out your RSS emails once, then rely on Feedotter to send them out on a regular cadence
- With Mailchimp + Feedotter, you can send beautifully designed RSS emails, without having to spend hours manually building them each week.