Most WordPress users know that there are thousands of plugins available to improve your website, and if you’re like everyone else on the web, you’re always looking for new ways to optimize your website for SEO. Of the thousands of SEO plugins available, Yoast SEO is one of the most used.
Below is a guide we’ve created full of the best practices for Yoast and utilizing this SEO plugin to the fullest for SEO advancement and results:
Search engines like Google use crawlers to index your site and place it in search engines. The easier it is for search engines to crawl your website, the higher you’ll rank. To best optimize your website with the use of Yoast SEO, you should create a sitemap. This makes it easy for search engine crawlers to index your pages.
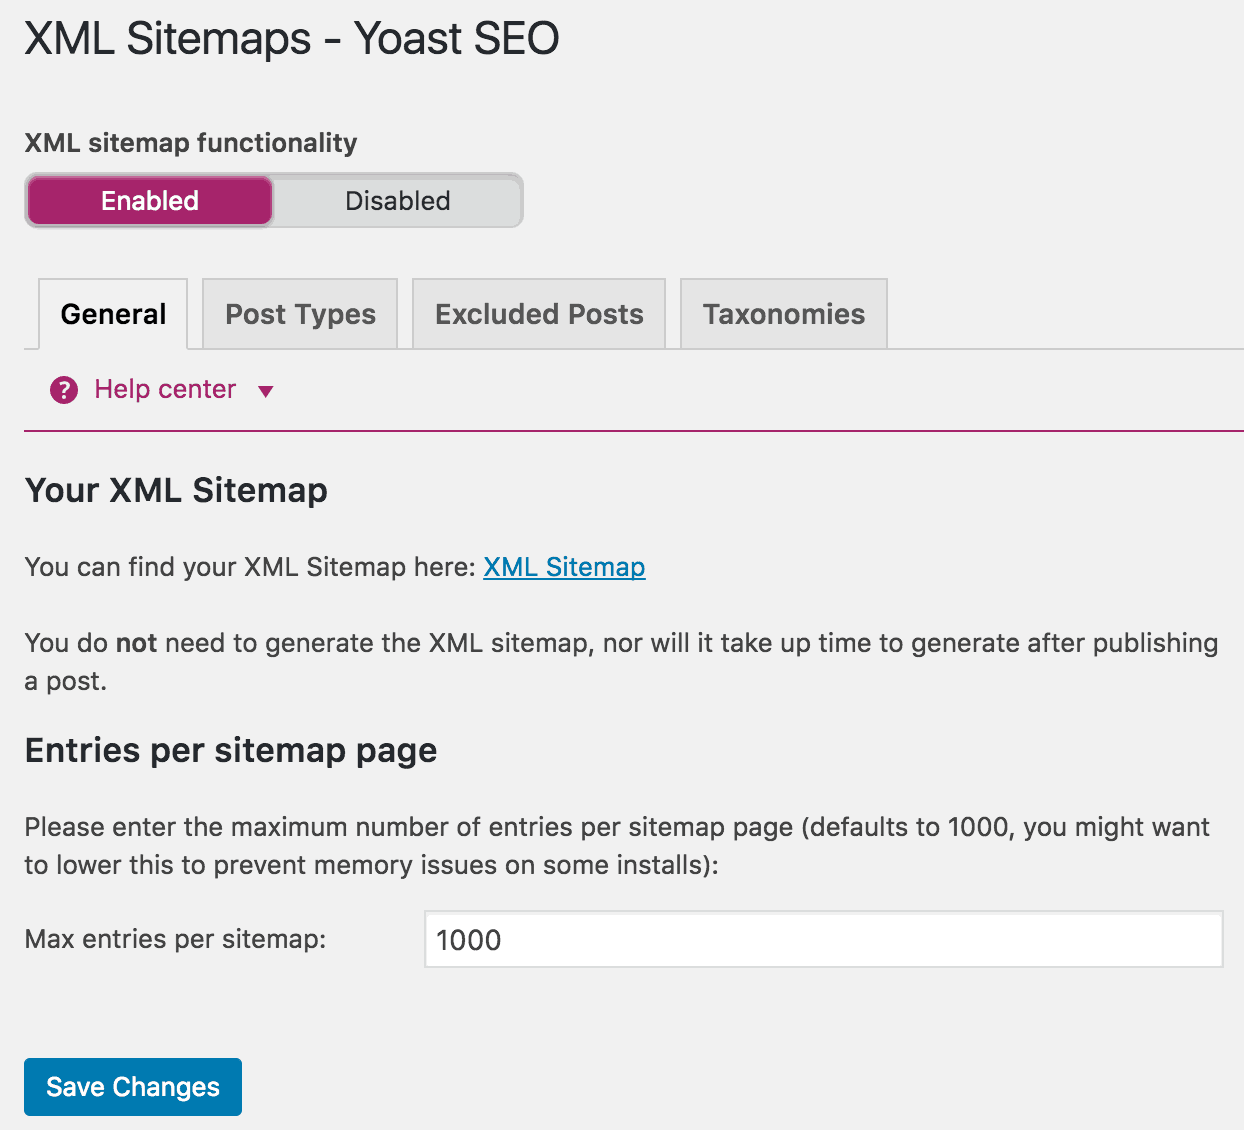
Yoast is perfect for SEO beginners and pros alike because it does all the hard work for you. Creating a sitemap is simple, but Yoast doesn’t automatically do so. On the left-hand side of your WordPress dashboard, click on “SEO” to access Yoast. You’ll choose the option for XML sitemaps and check the box to “Enable Sitemap Functionality.”

Once you’ve enabled the sitemap, take the sitemap URL and plug it into Google Search Console (found here if you’re unfamiliar). Log in to your Google Search Console and click the red button “Add a Property.” You can then type in your website and will be asked to verify by logging in to your hosting account:
Type in your complete website and you’ll be provided the code, as shown below when you choose “HTML tag.” Note: Only copy the code that comes after “content,” not the entire code, as circled below.
Copy the code and switch back to your WordPress dashboard. Choose the SEO option and then the “Webmaster Tools” tab. From here you’ll enter the code into the option for Google Search Console. You’ll need to go back to Google and verify your site. If you’ve followed the steps correctly, Google will let you know with a green checkmark. Once you’ve verified your site, give it a few minutes to be fully completed and you’re set!
We all know the key to effective SEO is utilizing high ranking keywords into content and websites. The first step in targeting keywords is creating high-quality content that Google and other search engines look for, and Yoast makes it easy to take your keyword and optimize it by targeting one specific keyword for each piece of content. If you’re using the premium version of Yoast, you’re able to optimize for two keywords.
Once you’ve created your content, run a Page Analysis through the plugin. This handy tool lets you know whether or not you’re using your keywords effectively. You’ll know you’re good to go if you have a green light next to each line. Of course, these should be used as a guideline for incorporating keywords into your content. The analysis lets you know:
You’ve worked hard to create great content, so chances are it will be shared across social media platforms (hopefully!). To have your content show up properly on all social media platforms, you’ll need to take a look at the Social tab option in your dashboard. Your images and content titles will still show up in feeds even if you leave this part blank; however this way you’ll have more control over the images and text that show up once your content’s been shared.
Head over to the Social option and you’ll see this:
Here you can rewrite your description and title (otherwise, it will automatically show up as the original description and content title) and upload an image. Images don’t need to be uploaded necessarily, but you never know which image will show up if you leave this spot blank. Plus, choosing an exciting image will generate more clicks and shares.
Yoast has plenty of options to optimize your website for search engines. But not all will apply to your situation. And some features, while helpful, may not help your SEO in the long run.
Here are some things to remember when you’re using this helpful tool:
One of the coolest features of Yoast is the green, red, and yellow lights that detect how well your content is doing. But people can (and do) become obsessed with getting all of their lights to go green. The lights aren’t as important as you may think. While they do help as a guide to control how well your keywords, etc. perform, you shouldn’t focus all your content based on the green lights. Simply create engaging content that people will want to read, and don’t focus so highly on whether or not Yoast thinks it’s great.
This is specifically true when it comes to the Readability scores. It can be very difficult to turn all of these lights green, and by the time you finished, it may not even sound like you anymore. While SEO you can be a little bit stricter, our advice is to craft an article that is easy to read and not worry about these scores.
Sometimes you may switch up your keyword to make the content flow. That’s perfectly fine and it’s often encouraged as not to stuff your posts with keywords. For example, if your keyword is “nanny” you may occasionally use the phrase “babysitter.” However, Yoast won’t pick up on this, and you may not get the coveted green light for your keyword usage.
Yoast has some awesome tools that streamline the SEO process. One of these tools is the Bulk Editor. While it’s a great concept, it may negatively affect all your hard work. Basically, this tool allows you to edit titles and meta descriptions in bulk. This way you won’t need to go into each post’s editor and update titles. The only downfall? This may create duplicate content that can seriously harm your SEO.
SEO is daunting for some, especially if you’re just setting up your website or blog on WordPress, but Yoast is jam-packed with helpful tools that make optimizing your page a cinch. The easy user interface and helpful video tutorials make it perfect for those who aren’t SEO pros. It’s a lot to take in at first, but once you’ve gotten the hang of it, you’ll be seeing instant results!
What is your favorite part about the Yoast plugin? Is there anything you would add to the list? Let us know your thoughts in the comment section below.
