

Before you can begin automating HubSpot RSS emails you will need to find the data source: an RSS feed.
Many websites have a feed tag that can be appended to the base url. An example is any website built on WordPress where the RSS feed typically looks like this:
https://website.com/feed/
https://website.com/category/feed/
https://website.com/tag/feed/
Where "feed" is appended to the end of the website, blog, category, or tag URL.
If your website is running on Drupal or Expression Engine it might look like this:
https://website.com/blog/rss.xml
If you still are not sure here are some additional resources we have published on finding RSS feeds:
How to find an RSS feed for any website:
https://www.feedotter.com/blog/find-an-rss-feed-url/
WordPress RSS Feeds For Categories and Tags
https://www.feedotter.com/blog/wordpress-rss-feeds-for-categories-and-tags/
How to Find You Uberflip RSS Feed
https://www.feedotter.com/uberflip-email/
HubSpot uses two common URLs for their RSS feeds. Adding these to the end of your blog's URL should produce your HubSpot RSS Feed content.
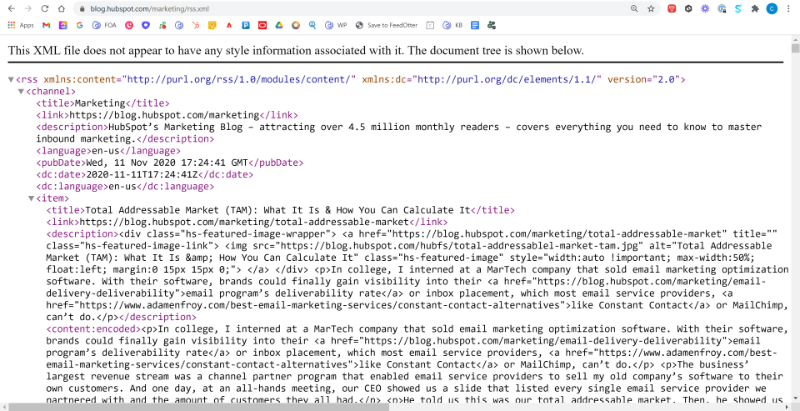
The two common URLs for HubSpot are found by adding feed.xml or rss.xml to the end of the base URL.
First, go to your blog page. Then, add feed.xml or rss.xml to the end of the URL.
For example,
https://www.feedotter.com/blog/feed.xmlor
https://www.feedotter.com/blog/rss.xmlThis should show you the RSS feed you can add to your FeedOtter account to pull in your emails' content.
If this format doesn’t find your RSS feed, follow this tutorial from HubSpot to find your RSS feed directly in your HubSpot account. Again, rss.xml is the most common format for HubSpot RSS feeds, but if this isn't your RSS feed URL, you can easily create one through HubSpot.

We have setup our HubSpot RSS email to automatically send every week, on Thursday at 9am CT. By default, FeedOtter will only send an email when there is new content. While optional, this is most typically left on. You can change this setting by clicking Show Advanced Options at the bottom.
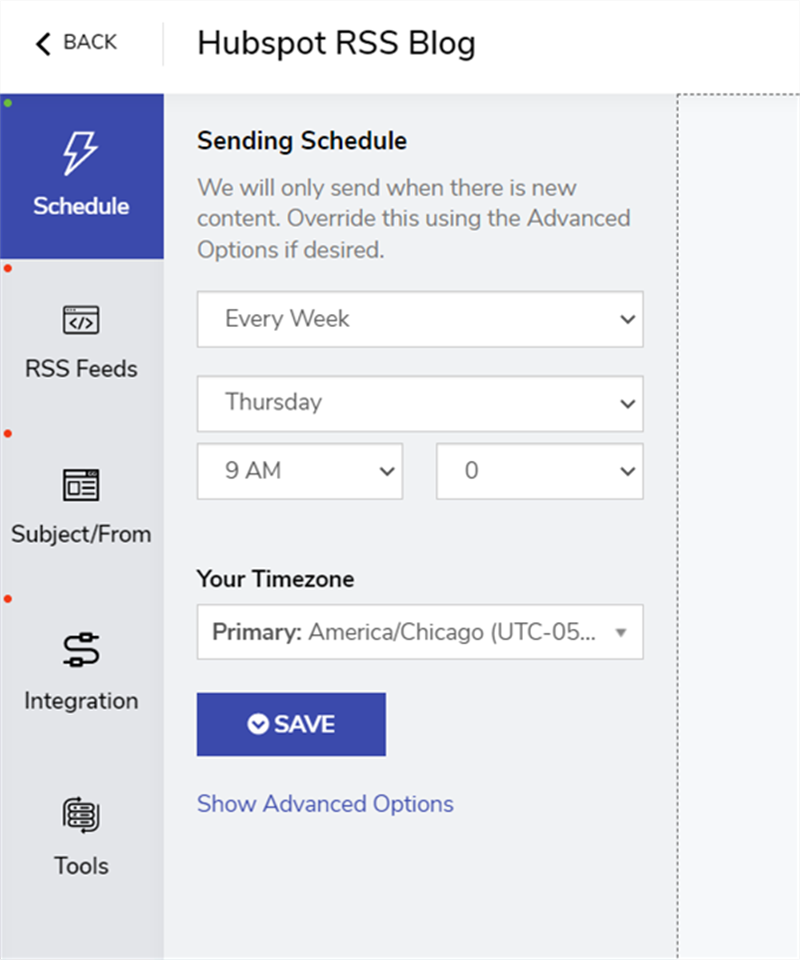
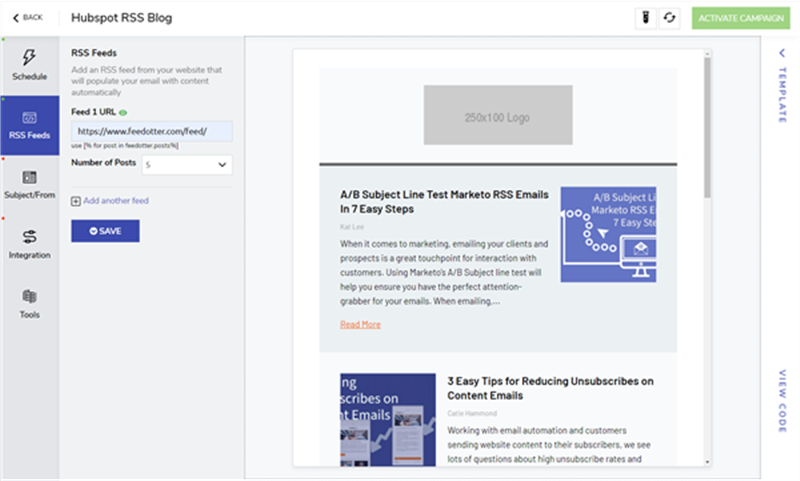
On the left side navigation bar select RSS Feeds.
Paste or enter the RSS feed you located in step 1 in the designated input box. FeedOtter will validate your feed and display an email preview using your feed content in the right pane of the application.
FeedOtter supports any valid RSS/Atom/XML feed. In addition, FeedOtter supports the advanced ability of adding multiple RSS feeds which can be combined into 1 content stream or used to create complex multi-section newsletters automatically.
If you’re not sure if your RSS feed will work with FeedOtter we recommend using https://validator.w3.org/feed/ to ensure your feed is valid. Any valid feed will work with FeedOtter.
Here, we also told FeedOtter to display 5 posts with each email send. This means FeedOtter will only send up to 5 new posts in your email.
FeedOtter includes a growing library of verified, Litmus-tested, email templates that you can use to build a great looking automated email very quickly. To browse the available templates select the TEMPLATE menu located in the upper-right corner of the application window.
The template panel will expand to show:
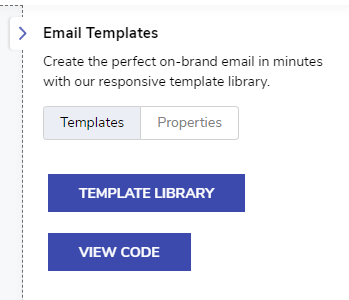
Template Library: Browse and select from our pre-built templates.
View Code: View, edit, tweak the code of the template you are using. Great for power users and essential for HubSpot footer setup (more to come below)
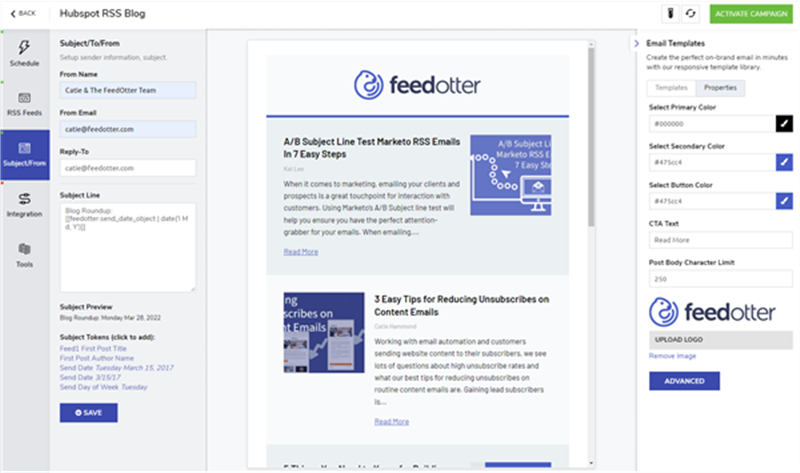
Properties: Click here to edit the colors, upload logos, and tweak our prebuilt templates fast.
If you are using one of the built-in email templates you can choose from any number of customization options. The most important ones are:
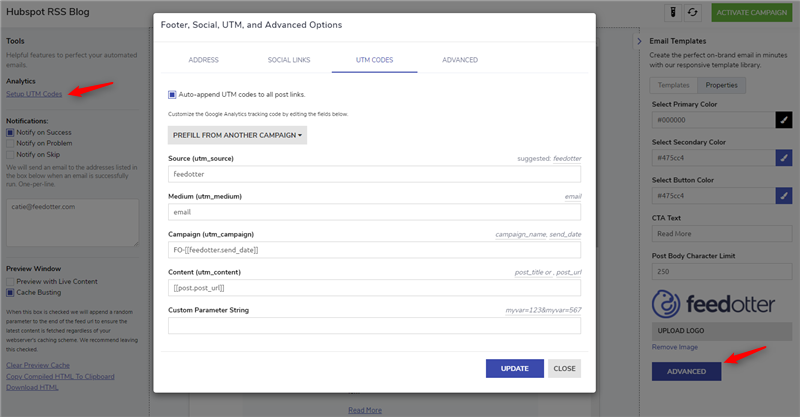
The RSS email we are creating will be sent by HubSpot and will rely on HubSpot's built-in campaign reporting to measure email engagement statistics such as opens and clicks but we also want to measure the increase in website traffic delivered by our content emails. To do this we can use UTM parameters.
FeedOtter has a built-in feature that will automatically add the correct UTM parameters to your content links so every click on your content will be tracked in your Google Analytics.
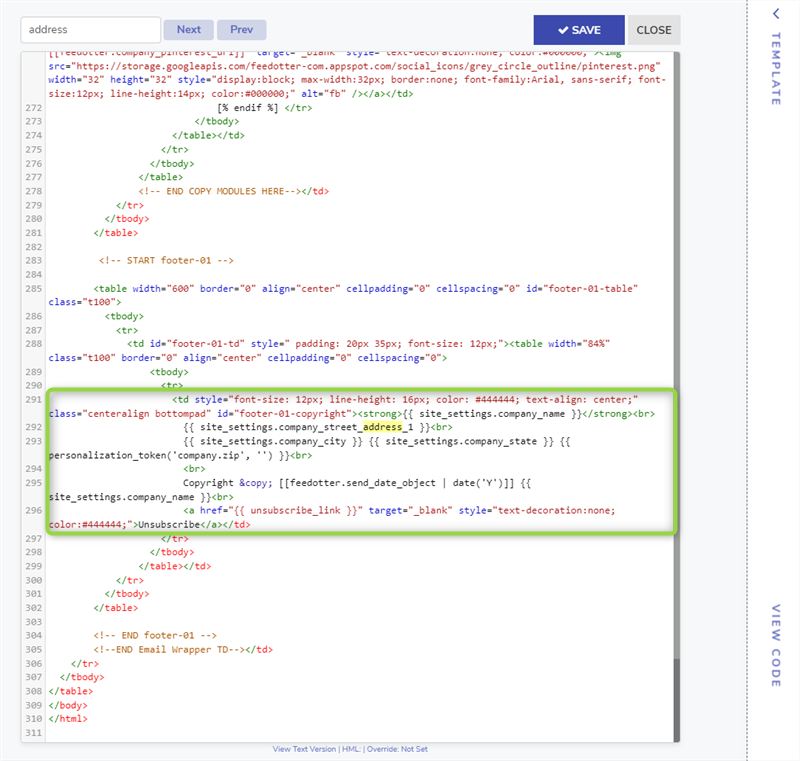
HubSpot requires specific tokens in the footer of all their emails that add your company's name, address, city, and state, and an unsubscribe link. This means you'll need to go into the code window and replace FeedOtter's tokens with HubSpot's tokens. Here's the required tokens from HubSpot:
{{ site_settings.company_street_address_1 }}
{{ site_settings.company_state }}
{{ site_settings.company_name }}
{{ site_settings.company_city }}
{{ unsubscribe_link }}
This step is only necessary if you are using one of FeedOtter's included templates.
Using the View Code feature mentioned above we will now replace the standard footer text with HubSpot's required address and unsubscribe tokens.
1. Click View Code in the bottom right corner. This will show you the HTML code of your email template.
2. Scroll to the bottom of the HTML email template and scan for the footer address fields. These will be FeedOtter tokens which we will replace with the above block of HubSpot tokens.
Again, remove:
[[ feedotter.company_name ? feedotter.company_name : '' ]] AND [[feedotter.company_name]] with {{ site_settings.company_name }}
[[ feedotter.company_address ? feedotter.company_address~' ' : '' ]] with {{ site_settings.company_street_address_1 }}
[[ feedotter.company_city ? feedotter.company_city~',' : '' ]] with {{ site_settings.company_city }}
[[ feedotter.company_state ? feedotter.company_state~',' : '' ]] with {{ site_settings.company_state }}
[[ feedotter.unsubscribe_link ]] with {{ unsubscribe_link }}
Replace with:
{{ site_settings.company_street_address_1 }}
{{ site_settings.company_state }}
{{ site_settings.company_name }}
{{ site_settings.company_city }}
{{ unsubscribe_link }}
3. Click Save.
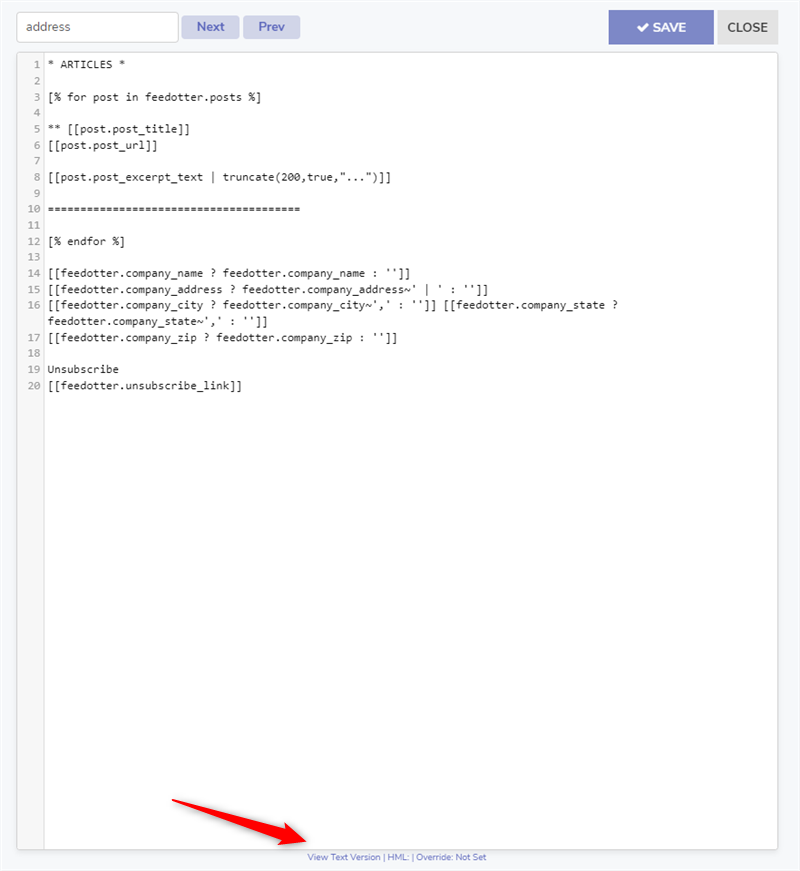
FeedOtter automatically creates a text version of your email as well. The same HubSpot tokens MUST be added to this version of the template.
Click View Text Version in the bottom of the code window.
When you are done with the campaign setup its time to publish your new automated RSS email to HubSpot where we will complete the last step of setting up our email audience.
Click the Integration tab button in the left column of your campaign window. Click Connect to HubSpot.
If you have previously setup a HubSpot connection in your FeedOtter account you can select it from the dropdown. Otherwise, click the Add a HubSpot Connection button.
Here is the basic auth flow:
At this point you will be returned to FeedOtter and your connection should be setup and ready to go.
When you have completed the above steps you will be presented with an interface that allows you to select the following:
Subscription Type
Start typing to search and select the subscription type or you can use the drop-down menu to select.
Included Lists & Excluded Lists
Here you can select which lists will receive your email and which ones should be suppressed.
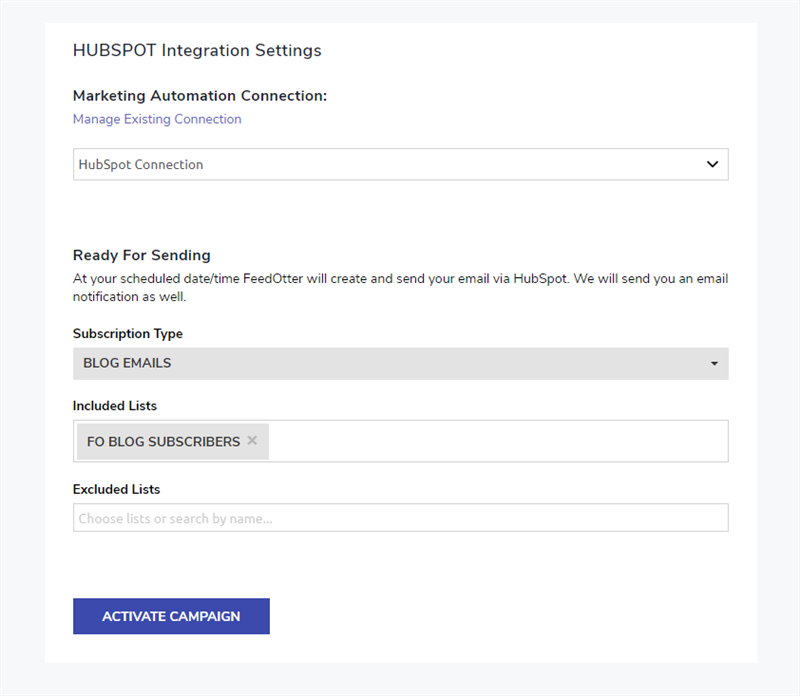
Click the Activate Campaign button to complete the setup.
Now that you've started your HubSpot RSS email campaign in FeedOtter, you can view, pause, and interact with your automated RSS email from the dashboard.
When the scheduled send time is reached, FeedOtter will pull content from your RSS feed and compose a new email and Marketing > Email in your HubSpot account.

HubSpot does not allow for the automated scheduling of marketing emails at this time so you will still need to login to HubSpot and schedule the email, however the hard work has been done for you.
Whenever you have an email ready to be sent and created in HubSpot FeedOtter will send you an email notification. To send your email:
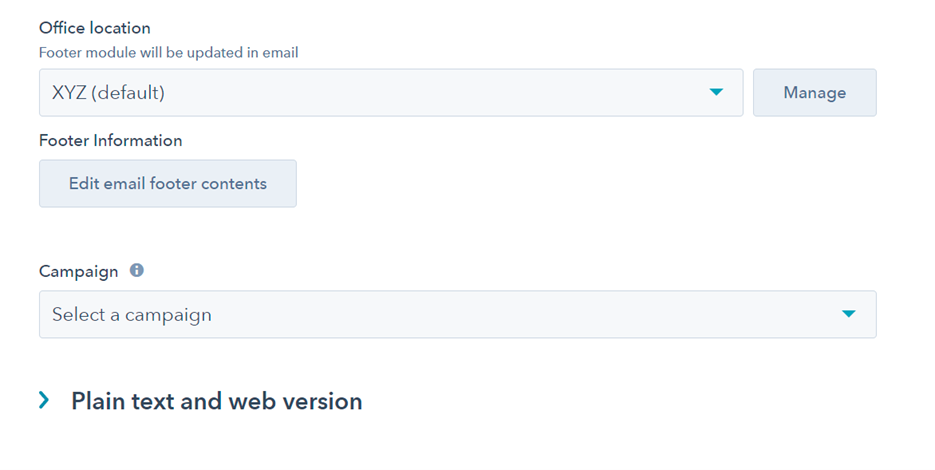
There are a few options you'll see on the email in HubSpot to fill but no worries! FeedOtter already takes care of the following:
