
Email marketing is a necessity for lead generation, traffic back to your website and ROI; but, too many marketing emails to the same potential leads can turn people away from your content. Marketo understands this concept and created communication limits for their emails to prevent sending too many emails. Along with communication limits, Marketo also created the Marketo Operational Email for those campaigns that need to be sent to your audience.
There’s always some marketing emails that need to be sent regardless of the communication limit such as automated blog emails or podcast emails to your subscribers expecting that content. As great as Marketo’s communication limits are, using the Marketo operational email allows you to send content emails that subscribers want in their inbox no matter how many marketing emails were sent that week.
Let’s dive in to how you can utilize this tool for your Feedotter emails.
Marketo Operational Email with Feedotter

Watch this video tutorial above or follow our step-by-step guide here.
You’ll need to ensure your Feedotter // Marketo automated email campaign is fully setup and created in Marketo.
1. Find ### – Feedotter Setup Email
In Marketo, click Marketing Activities > Feedotter Programs. Under this folder will be all of your Feedotter email campaigns you’ve previously setup. We’ll be focusing specifically on the ### – Feedotter Setup Email underneath your specific campaign.

Expand ### – Feedotter Setup underneath your email campaign and click the email underneath your setup program.
2. Bypass Communication Limits in Marketo
Here’s where we can edit the setup email to bypass communication limits in Marketo for all your following email campaign sends.
Edit Email Draft
On your setup email, click Edit Draft.

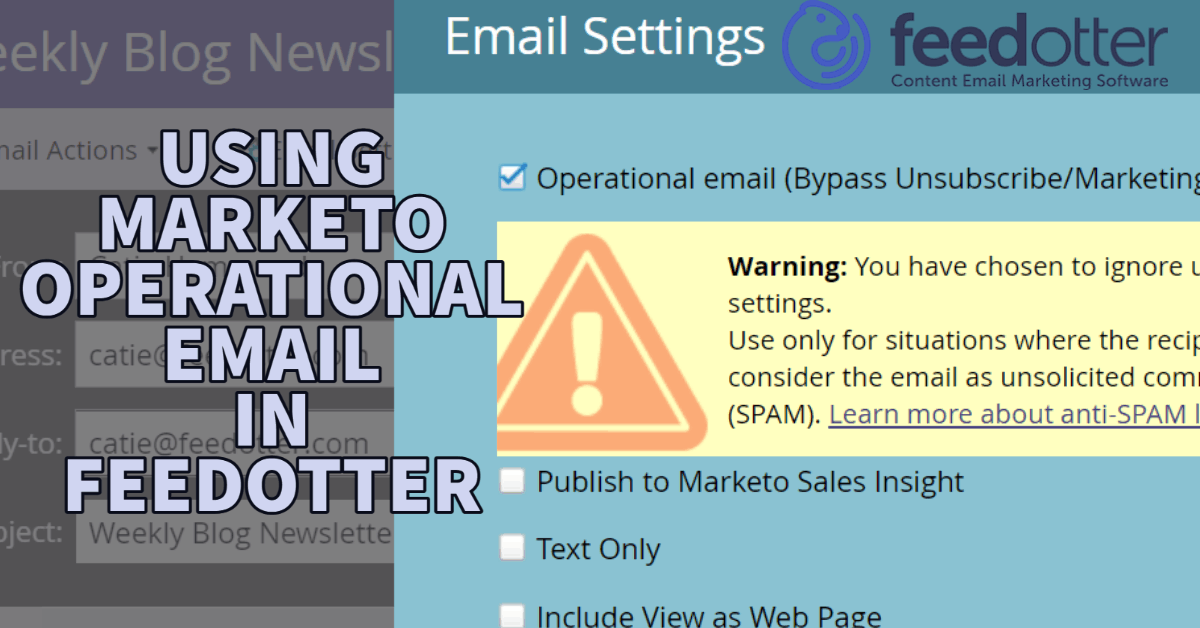
Here, click Email Settings.

When you see this popup, check Operational email to bypass communication limits for this email campaign. Click Save.
Approve & Close
Next under Email Actions, click Approve & Close.

This will finish setting up your email and will take you back to Marketing Activities to see your email campaign there.
Any changes you make to the setup program will automatically carry over to all email sends on this campaign. That means all your automated emails from this Feedotter campaign will send no matter the communication limits set in Marketo.
3. Ensure Marketo Operational Email is Working
Once you’ve Approved and closed your email, you’ll need to ensure everything is running and working the way you want in Marketo. To check this, find your setup email we just edited and look for two things: Green dot and Operational Email Alert.
Green Dot

This green mark ensures your email is still working and nothing is broken in your email campaign.
Marketo Operational Email Alert

This shows that you were successful in making this email an operational email and can now bypass communication limits in Marketo for this email campaign.
You’re all set! Next time Feedotter runs the email will automatically go out and carry over the settings from the Setup Email program.
Still having issues? Feel free to email us at success@feedotter.com or schedule a demo today for more information.