Over the last couple of articles, we’ve explored the topic of automated blog subscription tools and how they can help you expand your content’s audience while growing your email list strategically.
Today, we’ll dive into the process of setting up an automated blog subscription form on your website using ActiveCampaign, one of the more popular email marketing providers (ESP) currently available.
To make this guide as user-friendly as possible, we’ve provided detailed step-by-step instructions with visuals, so you can create your first blog subscription form in under an hour.
In case you missed it, start with: The Complete Guide to Blog Newsletter Subscriptions
Like many marketing projects, the setup is fairly straightforward…provided you’ve done the legwork into the strategy behind it all.
Today, we’re following this cadence to set up your blog subscription with ActiveCampiagn:

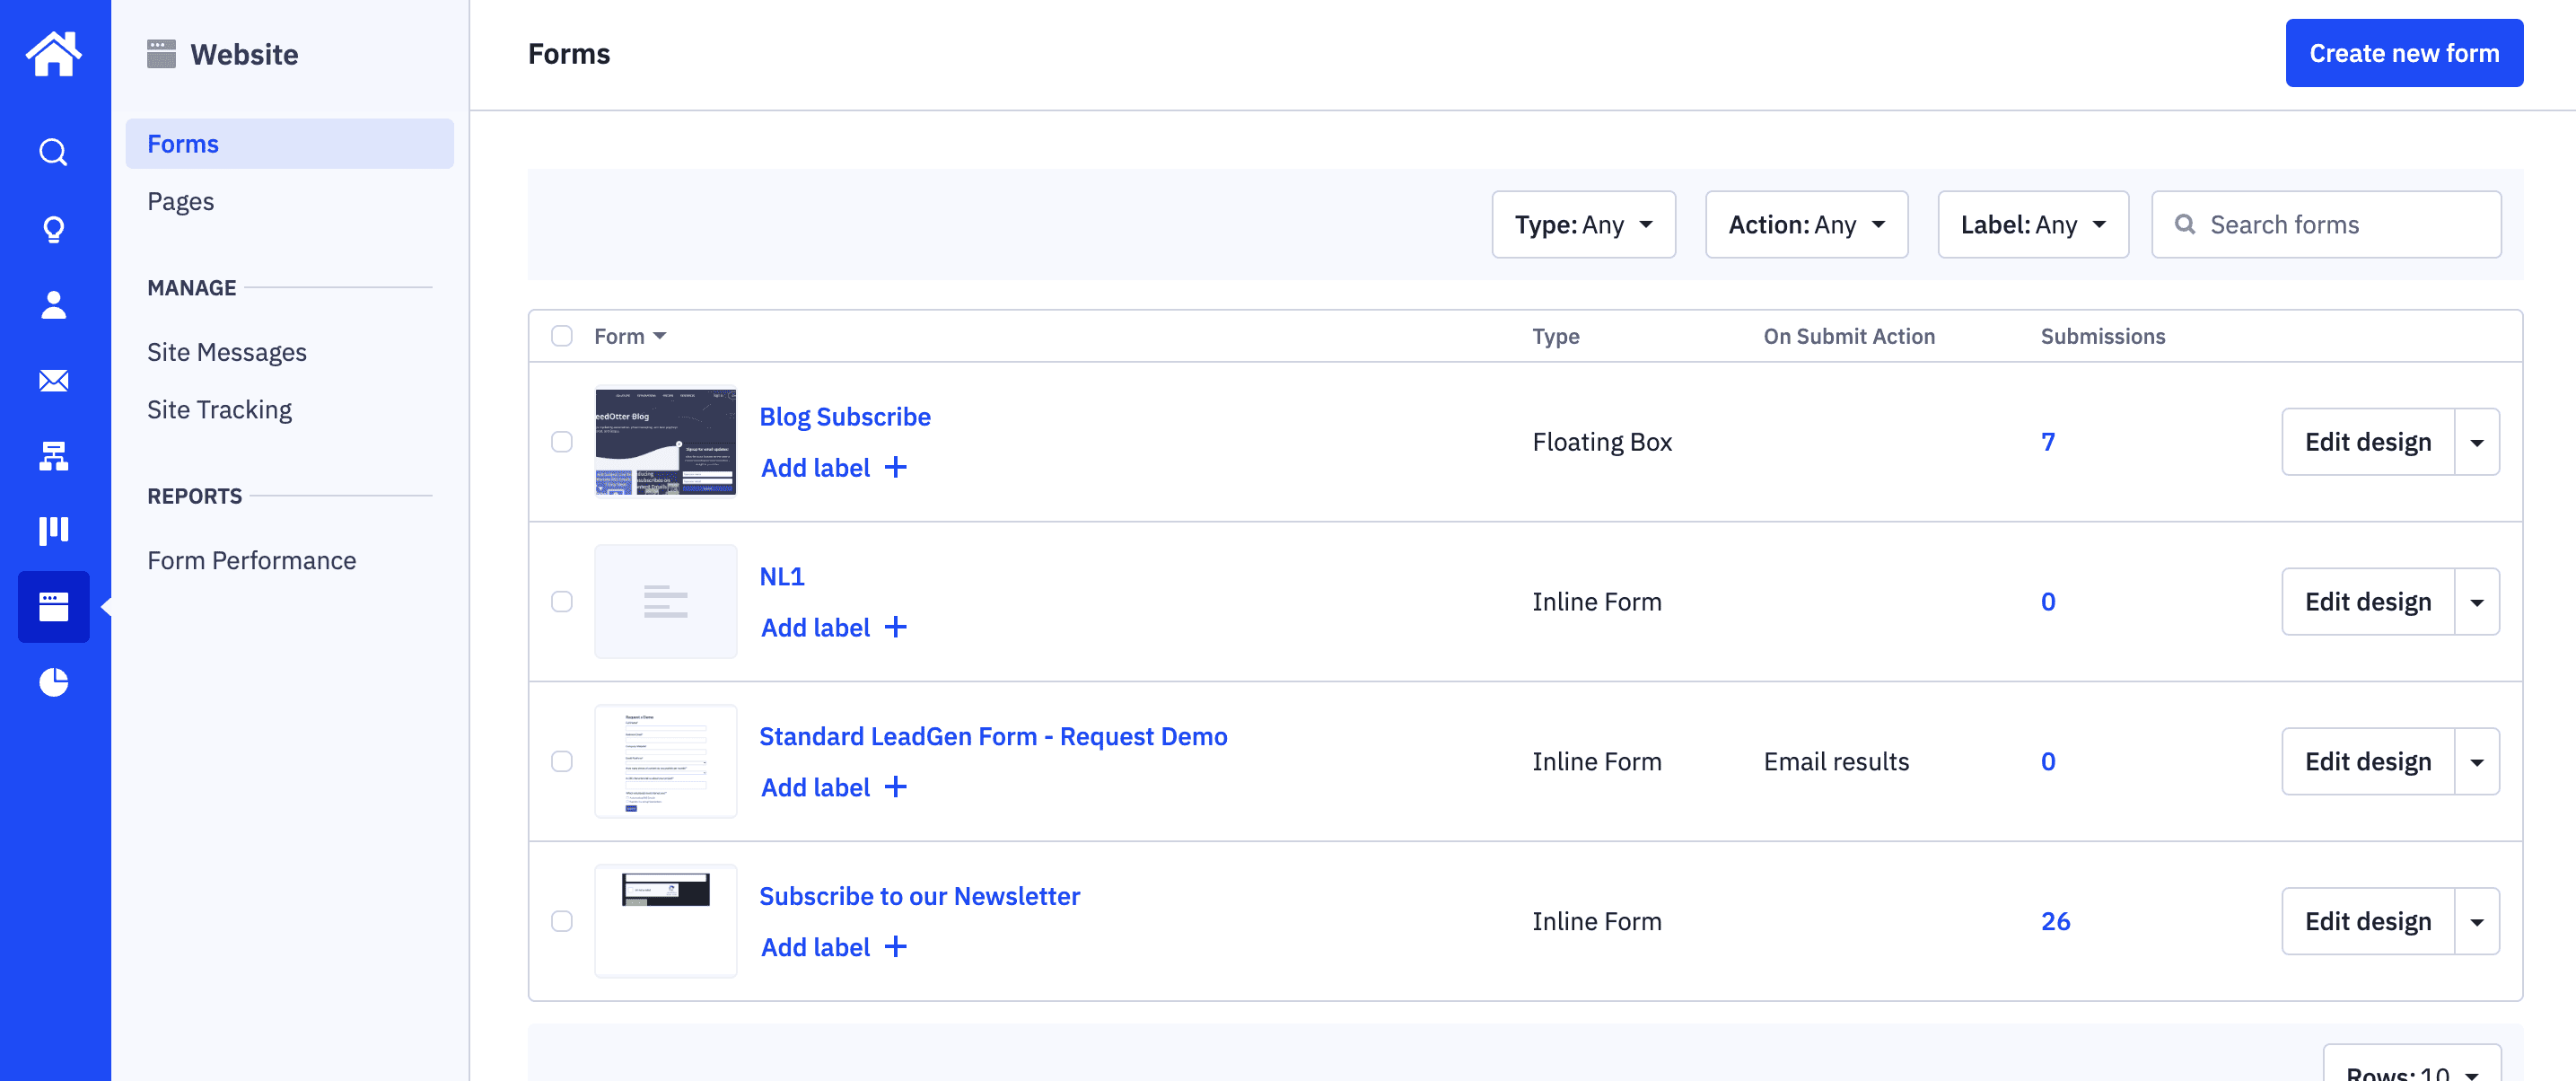
In your ActiveCampaign account, you’ll want to use the left sidebar to navigate to Website > Forms, then click on Create new form.
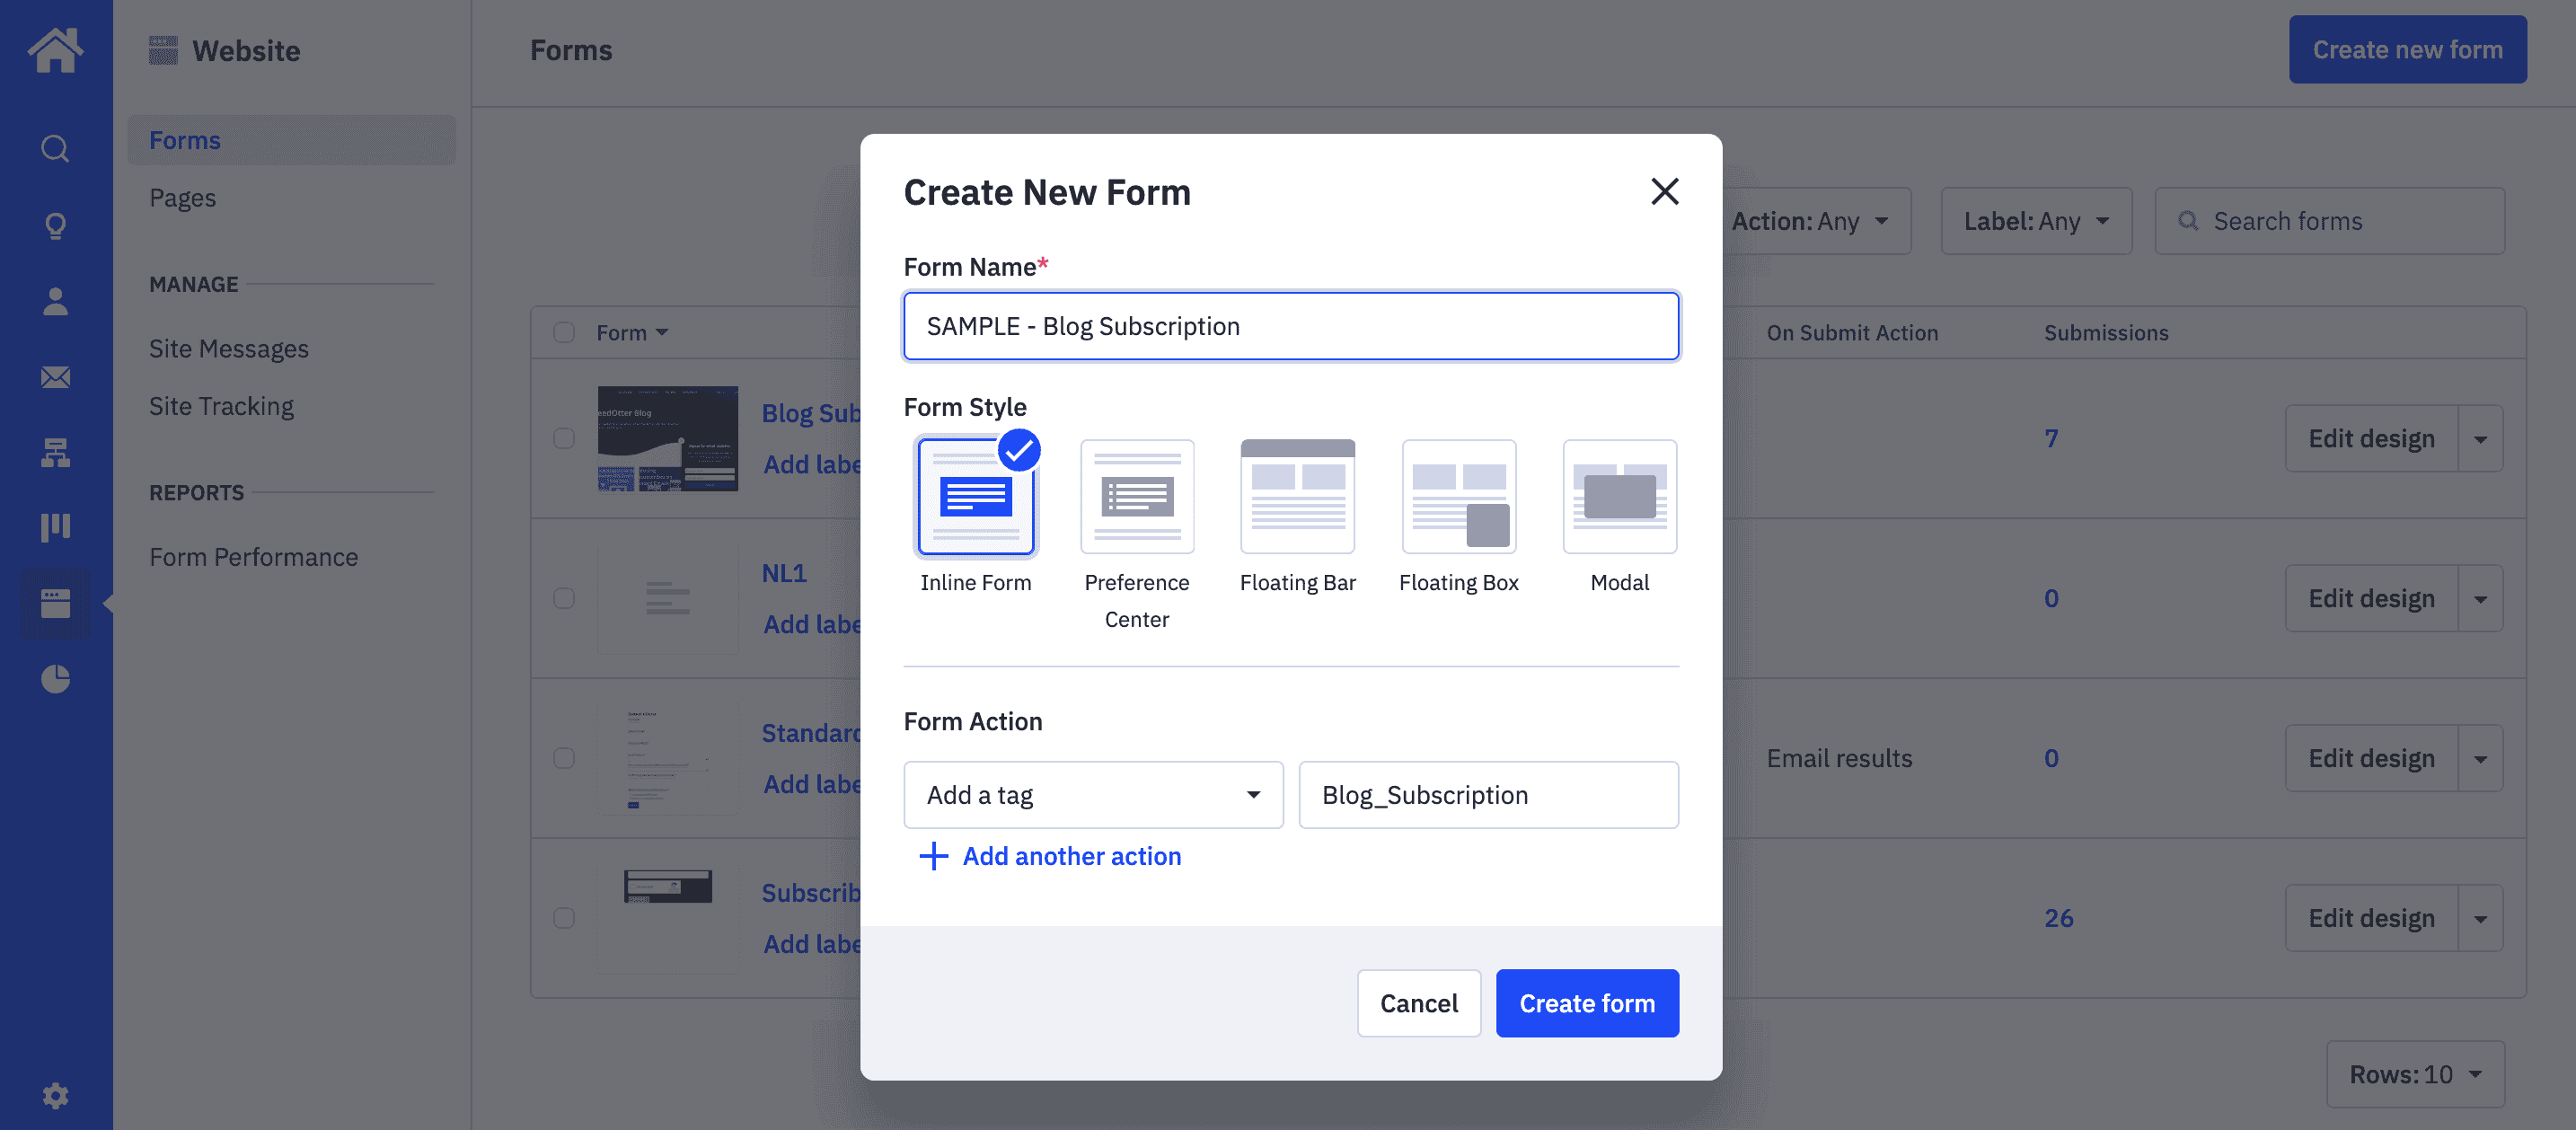
A popup should appear, where you’ll name your form and designate a few key settings:
Then, click Create form.
At this point, you should see the form design options. If you’re going to embed the form directly into your site, make sure you take the time to design it appropriately, using the Style tab.
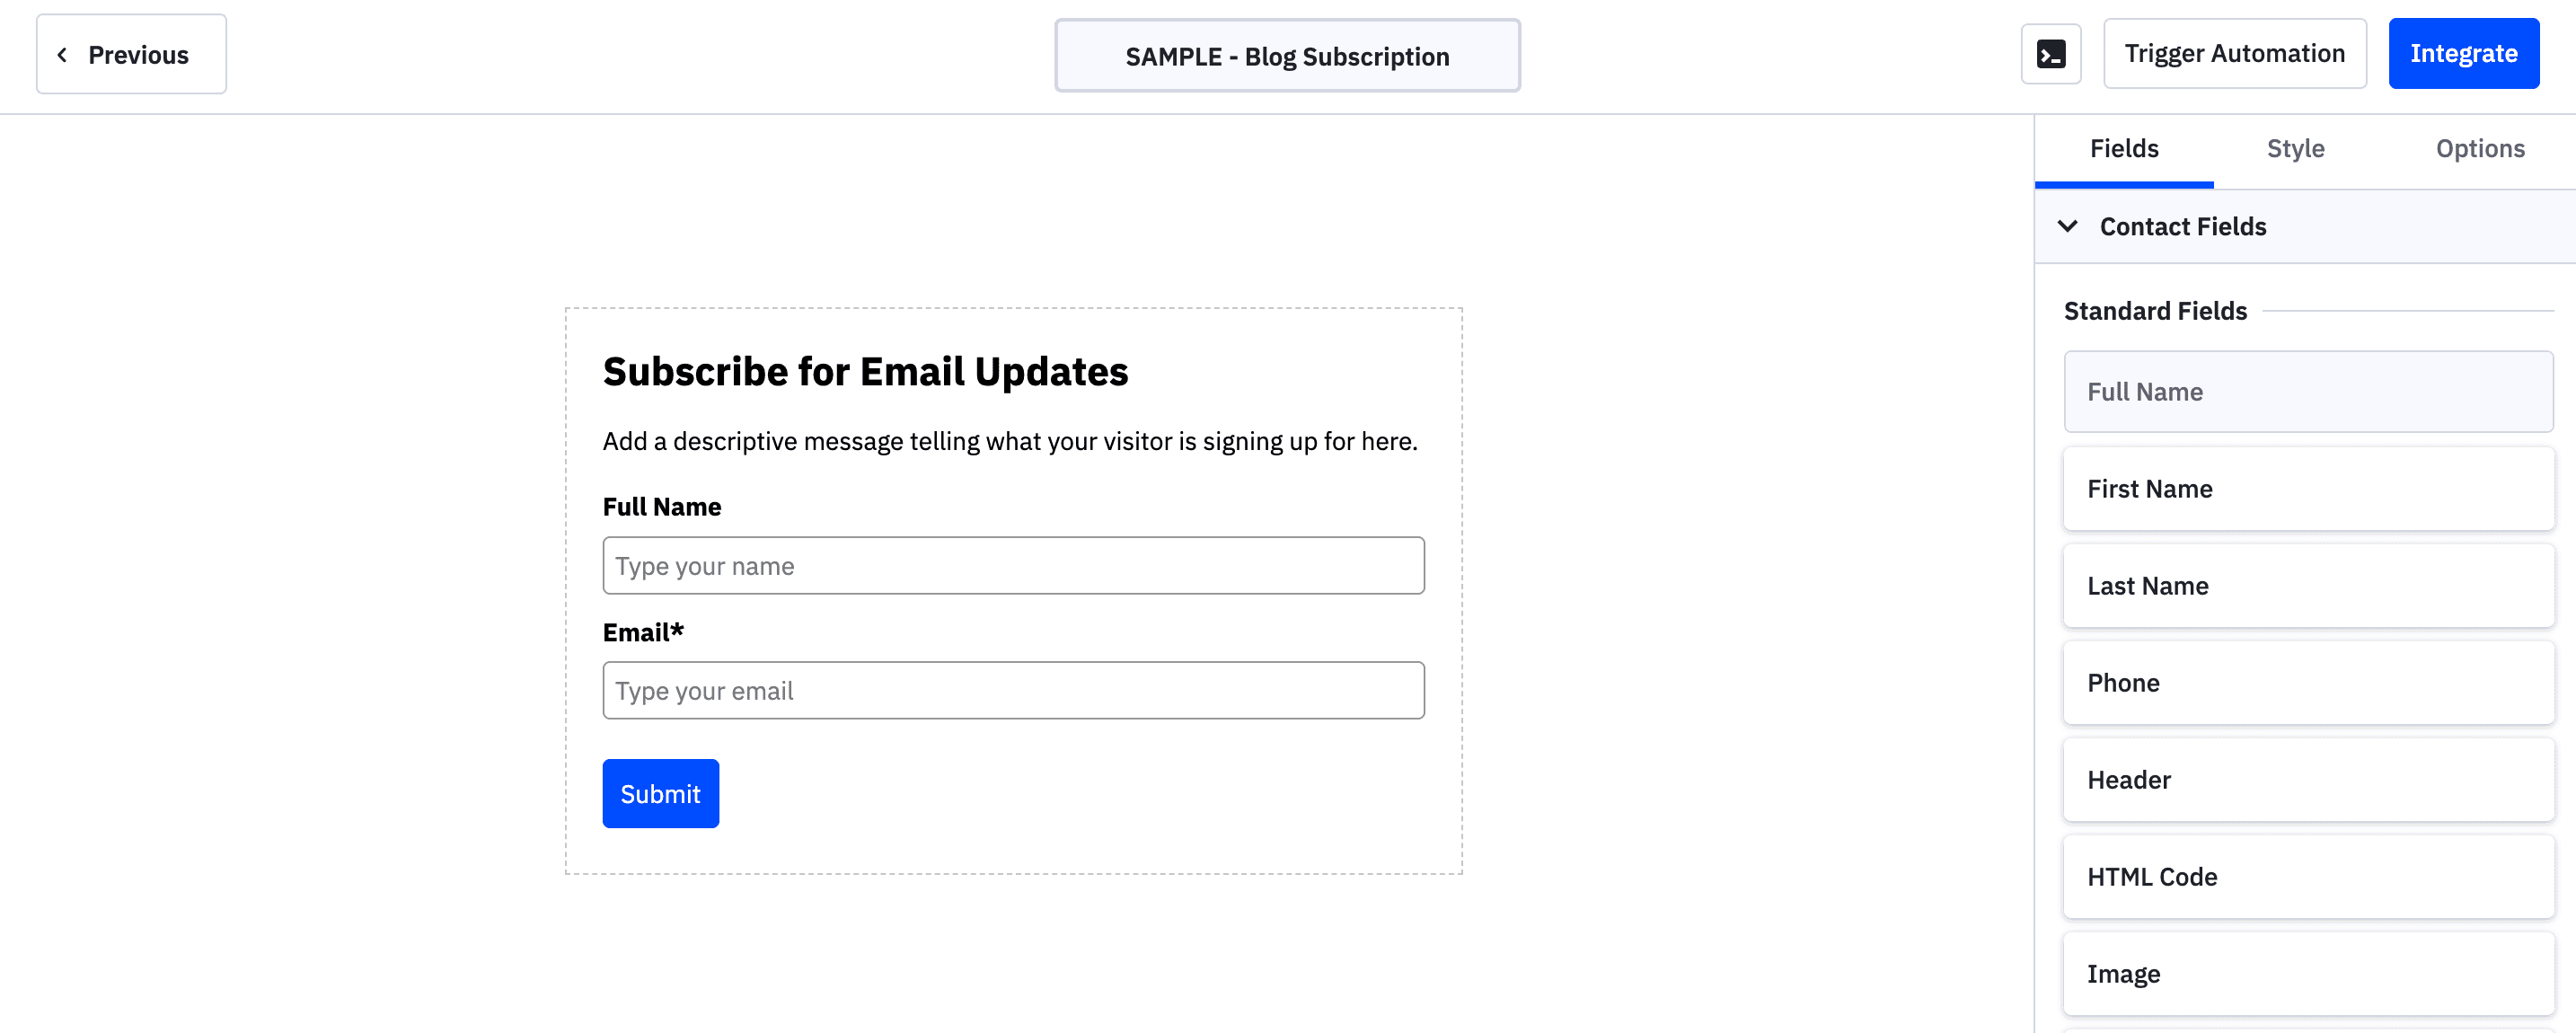
Once your form is fully designed and ready to be added to your website, click on the Integrate button. This will open a popup with code that you’ll need to copy + paste into your website.
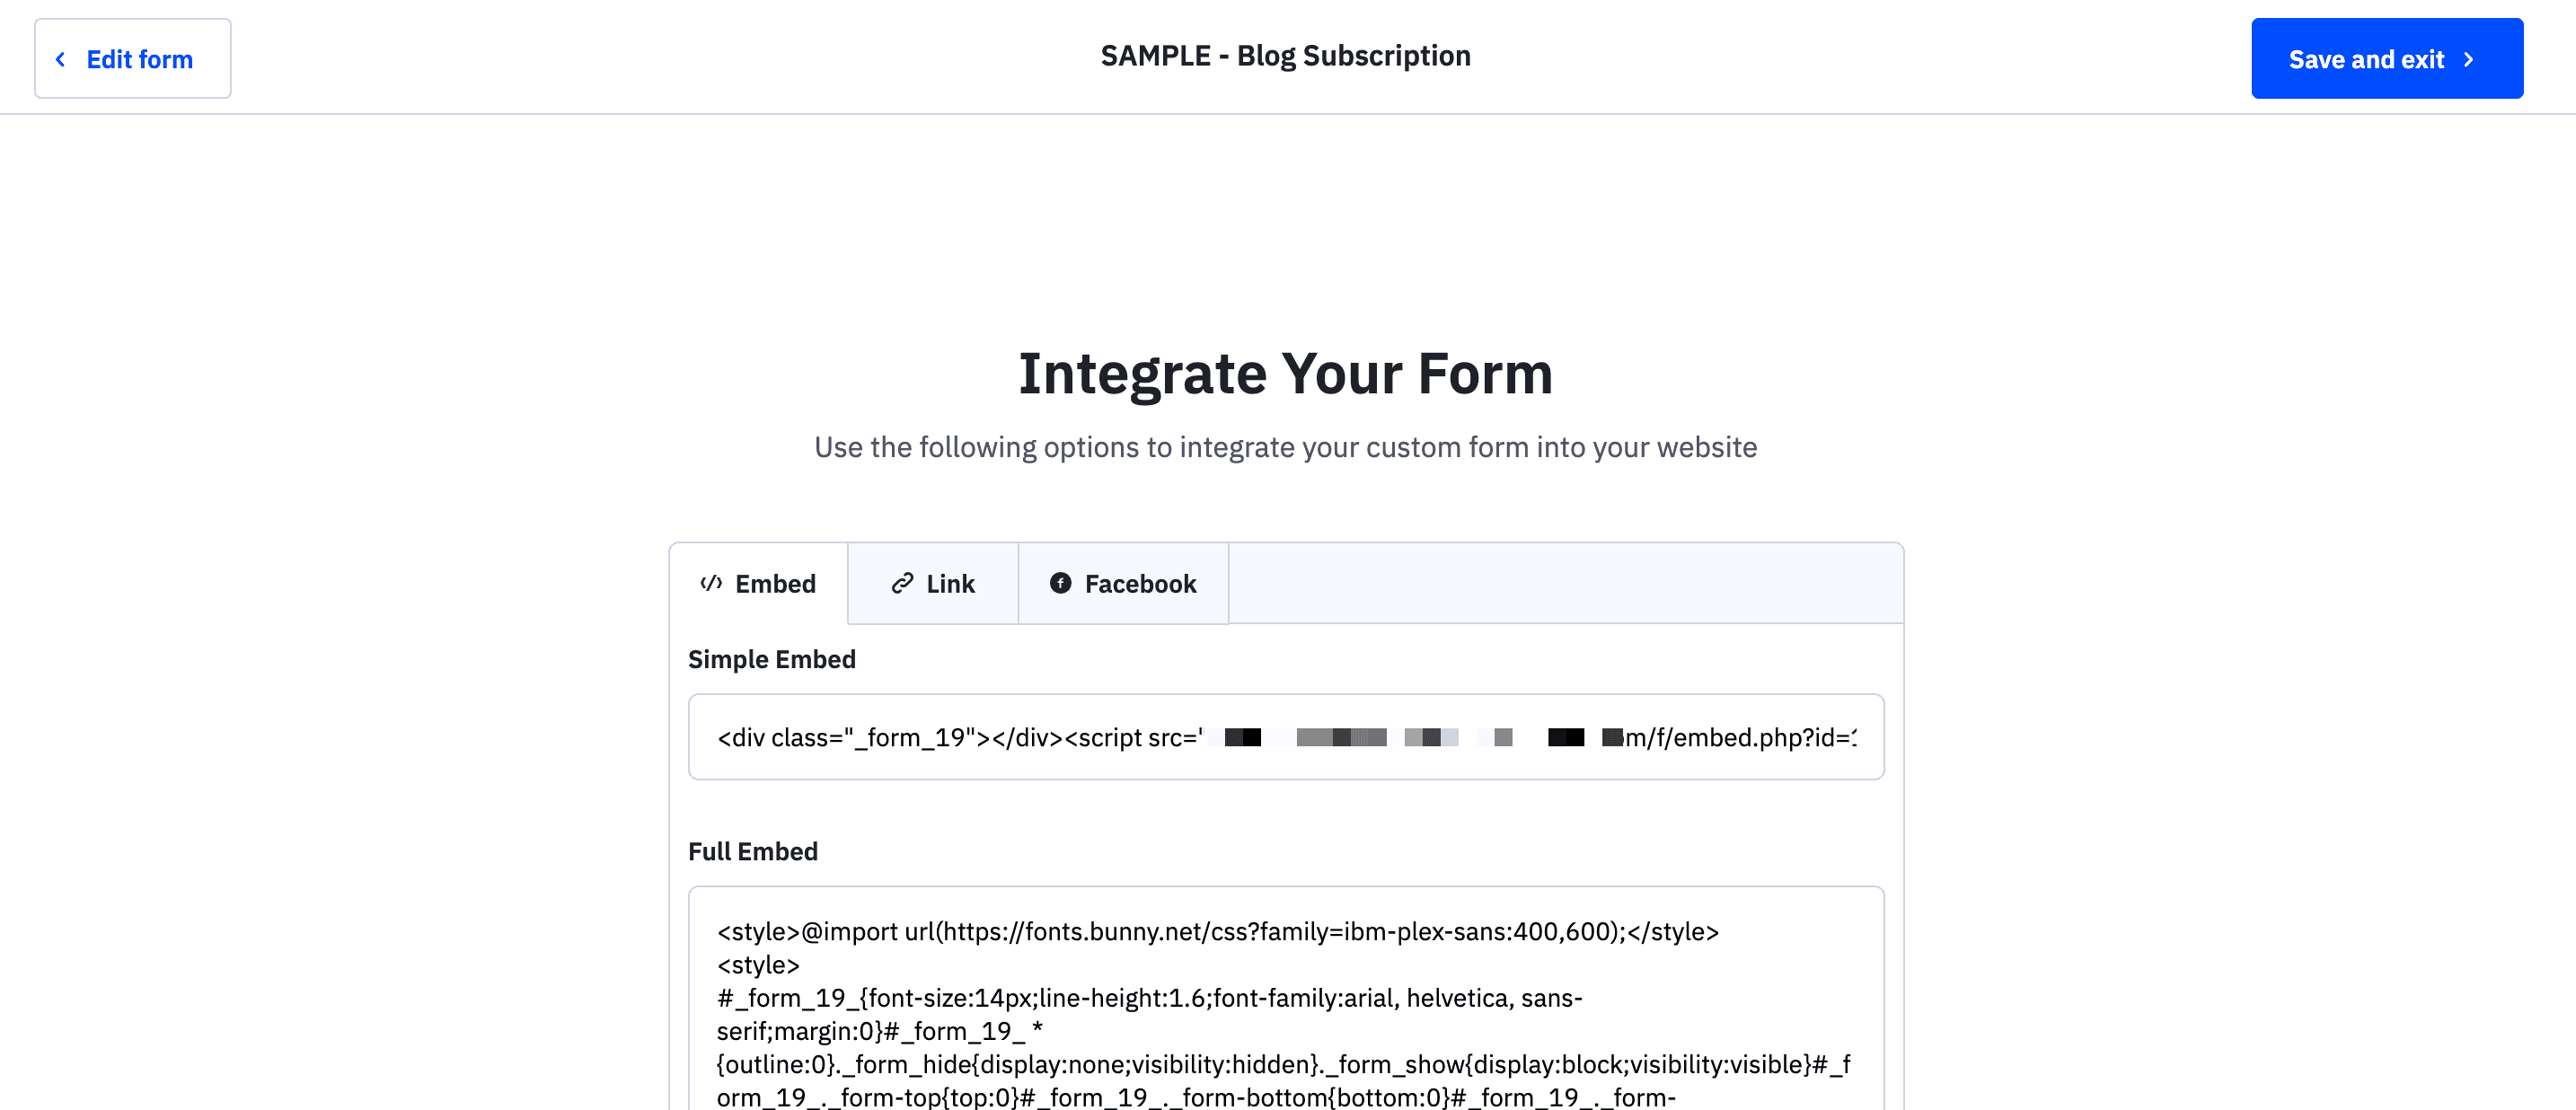
How you add the code to your website will look different, depending on what CMS you’re using.
Start by checking for a direct integration
ActiveCampaign has an Apps directory, which makes it super easy to find out if there’s already a direct integration available for you to use. (you’ll find the WordPress plugin in there, for example, as well as Shopify.)
Use a third-party plugin for optimized signup forms
If you’re already using a Wordpress opt-in plugin like OptinMonster, Gravity Forms, etc., you can integrate the plugin form builder directly with ActiveCampaign, which then allows you to use the plugin form builder to design and insert your blog subscription form, and then send all signups to your ActiveCampaign account.
Once your form is set up properly, you’ll want to create a follow up automation that will send a welcome message to your new subscribers.
In your HubSpot account, head to Automations > Automations > Create an automation.

This will take you to a screen where you can build your follow-up automation as needed.
Make sure you have the tag that you created for the form selected as the Trigger for this automation. You’ll also want to make sure that you immediately send a welcome email (or a lead magnet delivery email, if you’re using an opt in incentive).
Additional steps you can add include:
Once your opt-in form is live on your site, you’ll want to do a few different test submissions in an incognito window, a different browser, and on your mobile device, to cover the most basic use cases that website visitors might encounter throughout your blog subscription with ActiveCampaign setup.
When you send a test submission through your form, you’ll want to check that the email was properly added to your ActiveCampaign account (along with any tags that you designated).
You’ll also want to check your inbox to make sure that the welcome message was delivered within a few minutes after submitting the form.
Setting up an automated blog subscription with ActiveCampaign is fairly straightforward, although it does require time and strategic thought to ensure that it’s truly designed to convert from opt-in to welcome sequence.
One of the best parts about automation sequences like this blog newsletter setup is that it’s fully, completely automated. All you have to do is set it up once, and then it runs on autopilot in the background, freeing up your time for higher level projects.
…With one caveat:
You still have to build and send your newsletters every time you want a non-automated email to go out.
The hours for this part of the process add up quickly, especially if you’re a content-rich publishing company like Ziff Media Group, for example, which sends over 50 newsletters out each week.
If this is an area you want to grow and scale, you’ll want to consider adding an ActiveCampaign integration like FeedOtter, which will allow you to build content-rich newsletters in minutes, and send them out quickly on a schedule.
FeedOtter is a content curation and newsletter automation tool that supports the newsletter sending process in 3 main ways:
If your blog has an RSS feed, you can plug it directly into FeedOtter and set it up so that FeedOtter automatically builds and sends your RSS emails on a schedule.
Learn more about the benefits of using FeedOtter for your RSS email sends when using ActiveCampaign.
If you’re working with multiple content sources (blog, YouTube channel, social media, and more), FeedOtter can automatically curate your latest posts and videos—and have them ready to be added to your newsletters with a single click. All you have to do is decide which pieces you want in your newsletter, and FeedOtter takes care of reformatting the images and text to fit your newsletter design template.
If HubSpot is your primary ESP, all your integrated tools should defer to it as the “hub” of your marketing activity. Even though FeedOtter allows you to quickly build and send emails, it actually uses the integration to send the email to ActiveCampaign for the actual sending. Deliverability rates are not affected by building an email in FeedOtter versus in ActiveCampaign itself.
Book a 1:1 demo to see how you can elevate and scale your newsletter process with FeedOtter.
