“How can I get rid of the ‘This post first appeared on’ sentence on my blog’s RSS feed?”
That’s a popular question that FeedOtter receives often from marketers. The sentence ‘This post first appeared on’ seems innocuous enough, but can actually be problematic. In an age where marketers are repurposing content and updating old posts for relevance and keywords, having a specific call-out to when it was first published can damage credibility.
For example, if you published a post in 2015, but have updated it to reflect trends and to be current, a 2015 publishing date can dissuade your potential audience from reading further because they think the information is not relevant or outdated.
So back to the question at hand. First, we’ll examine how it gets added to your RSS blog feed and email newsletters and then demonstrate how to remove it for two of the most popular SEO plugins for WordPress: Yoast and Rank Math.
Removing “This Post First Appeared” in Yoast
The Yoast SEO plugin has been around forever and makes tweaking the SEO subtleties of any WordPress website simple. If nothing else it is a great tool for ensuring your XML sitemaps are in order.
One downside to using Yoast is that some of the default settings add unwanted text to your blog posts and content—specifically the content that displays in your website’s RSS feed. If you are using your RSS feed to distribute content via email newsletters or marketing automation software this can be less than ideal. Why?
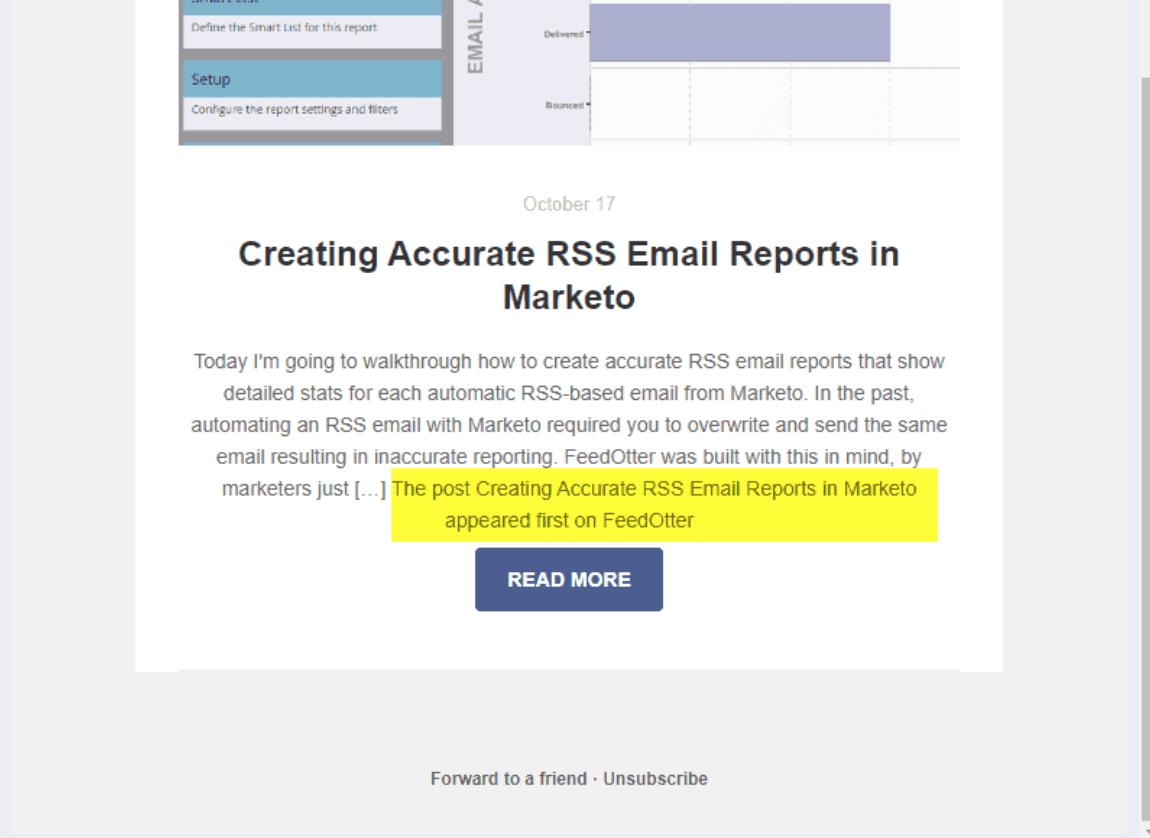
By default Yoast adds a fragment of text to every WordPress Post which looks like this:

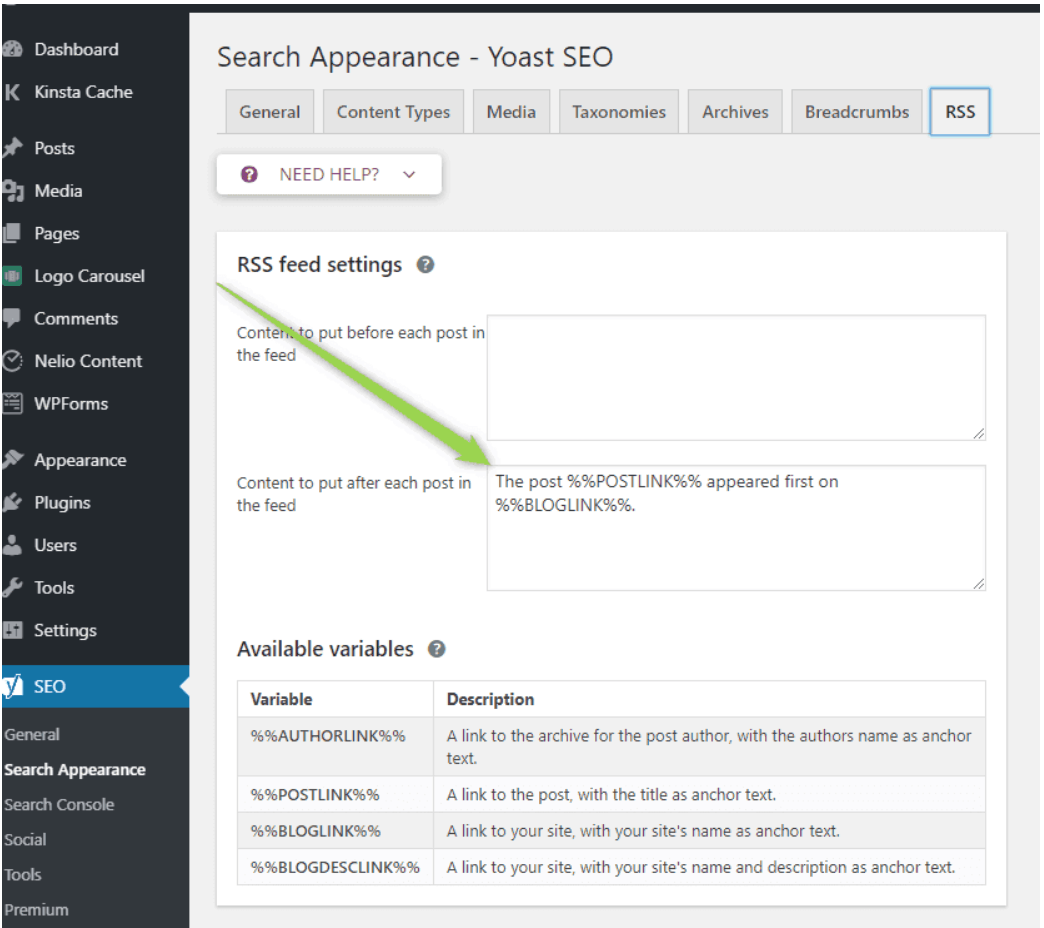
Fortunately, it is easy to adjust Yoast so that this line doesn’t show up. Here’s where to go:
- In your WordPress Admin, look for the SEO section on the left-side menu.
- Select Search Appearance
- Then select the RSS Tab

See where the green arrow is pointing? That is the culprit. To fix, simply delete the text and click the Save Changes button. And voila! The issue is fixed.
Removing “This Post First Appeared” in Rank Math
Rank Math is another popular SEO plugin available in WordPress. Removing the ‘This post first appeared’ text from your RSS feed setting in Rank Math is similar to Yoast.
To remove it:
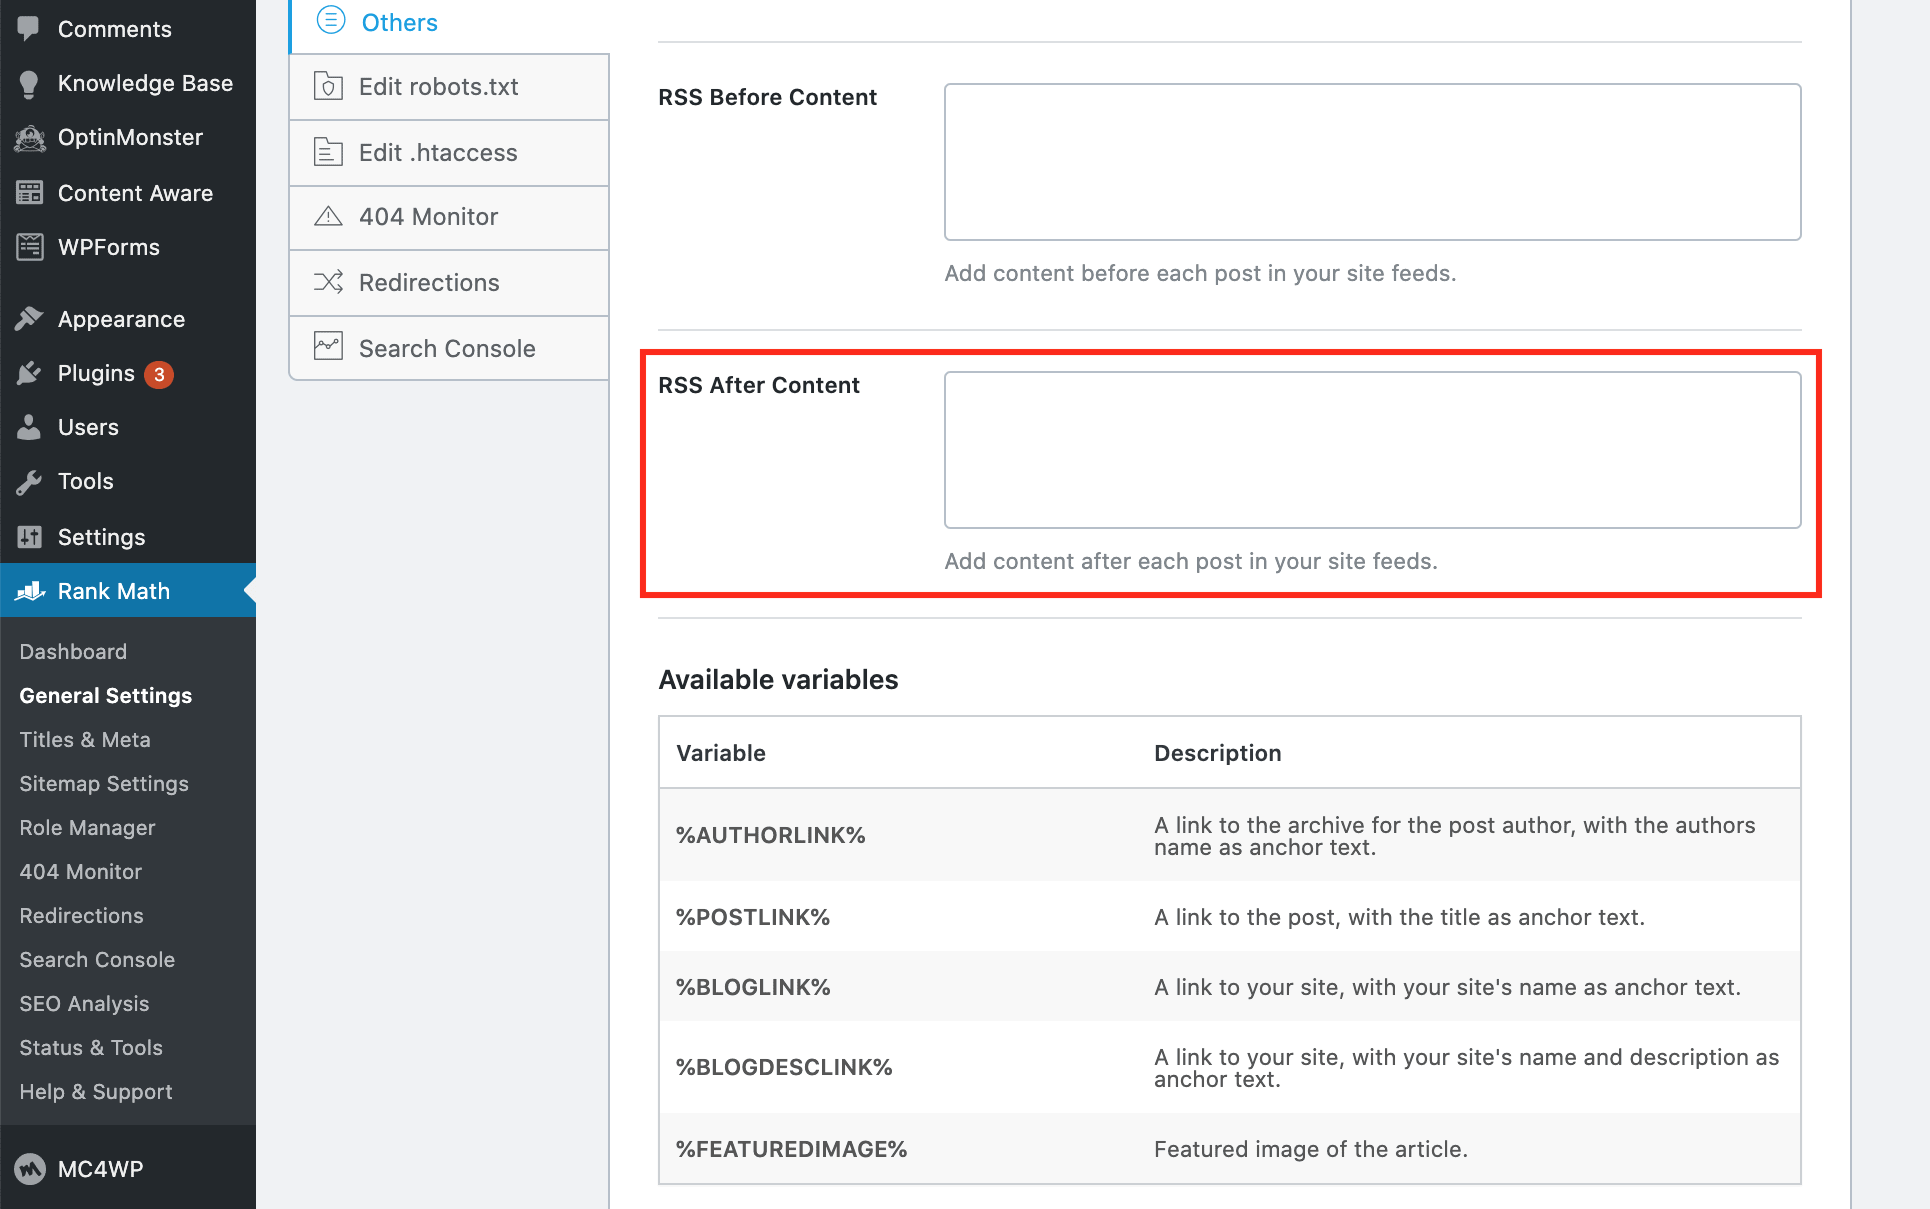
- In your WordPress Admin, look for the Rank Math section on the left-side menu.
- Select General Settings
- Then select the Others tab

Just like in Yoast, there will be a box (highlighted in red here) for ‘RSS After Content’. Make sure to remove any text here and then click the Save Changes button.
And just like that, you’re finished! For similar tips, be sure to check out our quick and easy best practices for Yoast.

